Tag: Visual edit |
|||
| (47 intermediate revisions by 23 users not shown) | |||
| Line 1: | Line 1: | ||
| + | {{about|the boss in [[Kingdom Rush]]|the unit in [[Kingdom Rush: Vengeance]]|Shop}} |
||
{{EnemyInfobox |
{{EnemyInfobox |
||
|name = The Juggernaut |
|name = The Juggernaut |
||
| − | |image = [[File: |
+ | |image = [[File:EnemySqr_Jugg.png|center]] |
| − | |hp = 10000 |
+ | |hp = 8000/10000/12000 |
| − | |damage = 150-250 |
+ | |damage = [[File:Melee.png]] 150-250<br/>[[File:Ranged.png]] 150-150 |
| + | |rate= [[File:Melee.png]] 2.5s<br/>[[File:Ranged.png]] 14s |
||
|armor = None |
|armor = None |
||
|resist = None |
|resist = None |
||
|speed = Slow |
|speed = Slow |
||
| − | |lives = 20 |
+ | |lives = 20}} |
| ⚫ | |||
| − | |bounty = N/A |
||
| ⚫ | |||
| − | == |
+ | ==Overview== |
| − | '' |
+ | ''A mindless unstoppable machine of destruction. The Juggernaut obliterates any army that tries to stop him.'' |
| + | [[File:The_Juggernaut_Punch.png|thumb|The Juggernaut punching an [[Imperial Guard]].]]The Juggernaut doesn't have much going for him beyond being a construct while his [[Golem Head|minions]], unique to his fight, can be spawned via cluster bombs anywhere on the map that isn't past the 3 Imperial Guards at the top, with decent stats going for them. He has one particular key problem: well-upgraded [[Holy Order|Paladins]] can put him in a melee lock loop. The Juggernaut does have an area attack and a long-range missile launcher, but they don't do enough damage to wreck fully upgraded Paladins. This isn't too bad, though, because he's the first boss. He is not supposed to be very difficult, but to show the player how important it is to focus on a combination of stalling and sheer dps to take on extremely durable enemies. |
||
| − | ==Information card== |
||
| − | [[File:The_Juggernaut.png|thumb|left|167px|The Juggernaut information card]] |
||
| − | |||
| − | |||
| − | |||
| − | |||
| − | |||
| − | |||
| − | |||
| − | |||
| − | |||
| − | |||
| − | |||
| − | |||
| − | |||
| − | |||
| − | |||
| − | |||
| − | |||
| − | |||
| − | |||
| − | |||
| − | |||
| − | |||
| − | |||
| − | |||
| − | ==Attacks== |
||
| − | [[File:The_Juggernaut_Punch.png|thumb|The Juggernaut punching an Imperial Guard.]]The Juggernaut has three attacks he will use: |
||
| − | *Missile - He will fire a missle that will crap out explosions. |
||
| ⚫ | |||
| − | *Punch - He will launch his hand forward, killing the world! |
||
==Strategy== |
==Strategy== |
||
| − | * The Juggernaut enters the map from the right |
+ | * The Juggernaut enters the map from the right, so concentrate your towers in this area. |
| − | * Make sure that you have towers near the |
+ | * Make sure that you have towers near the top of the map. The Juggernaut's Golem Heads often spawn very close to the castle. Using [[Arcane Wizard]]s with teleport is also a good tactic to stall Golem Heads, as they can send all of them back in the path. |
| − | * Whenever you get the chance, place reinforcements near |
+ | * Whenever you get the chance, place reinforcements near the Juggernaut. Even if he destroys them with one strike, they will slow him down. |
| + | * If the player is using a durable melee hero like Gerald or Malik, they are almost useless against the Golem Heads and should be used to tank against the boss instead. |
||
| + | * The Juggernaut prioritizes the [[Imperial Guards]] with its missile. |
||
| + | ==Related [[Achievements]]== |
||
| ⚫ | |||
| + | [[File:Achievement_Nuts_and_Bolts.png|50px]] '''NUTS AND BOLTS''' Defeat The Juggernaut. |
||
| ⚫ | |||
| ⚫ | |||
| − | * The missile that The Juggernaut fires is much like that of the missle that the Big Bertha uses.Hinting the tower buty due the late appereance maybe after The Citadel bombbards go near the carrcass of it finding unuse spare ammo and after that make a blue print for the Big Bertha. |
||
| + | * The [[500mm Big Bertha]]'s special abilities Dragonbreath Launcher and Cluster Missile Xtreme operate very similarly to the Juggernaut's weapons, implying that it was the result of reverse engineering the Juggernaut. |
||
| ⚫ | |||
| + | * The [[Dark Knight]] and [[Dark Slayer]] seem to be minions of The Juggernaut as they have similar helmets. |
||
==Appearances== |
==Appearances== |
||
| − | [[The Citadel]] |
+ | * [[The Citadel]] |
| − | <gallery |
+ | <gallery> |
| − | Juggernaut |
+ | Juggernaut boss.png|Full size HD image of Juggernaut |
| − | Golem Head Ball.PNG|The ball that The Juggernaut fires, from which Golem Heads emerge. |
||
| ⚫ | |||
| ⚫ | |||
Juggernaut.png |
Juggernaut.png |
||
| ⚫ | |||
| ⚫ | |||
| ⚫ | |||
| + | Juggernaut Scrap.PNG|When defeated, the Juggernaut will collapse into a pile of metal. |
||
</gallery> |
</gallery> |
||
| + | |||
| + | {{DEFAULTSORT:Juggernaut, The}} |
||
| + | |||
| + | {{Enemiescollapsed}} |
||
| + | [[Category:Kingdom Rush]] |
||
[[Category:Enemies]] |
[[Category:Enemies]] |
||
| − | [[Category: |
+ | [[Category:Bosses]] |
| + | [[Category:Ranged Enemy]] |
||
Revision as of 06:42, 6 February 2020
- This article is about the boss in Kingdom Rush. For the unit in Kingdom Rush: Vengeance, see Shop.
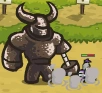
The Juggernaut is the first boss in Kingdom Rush, encountered at The Citadel. He often fires missiles and summons Golem Heads.
Overview
A mindless unstoppable machine of destruction. The Juggernaut obliterates any army that tries to stop him.
The Juggernaut punching an Imperial Guard.
The Juggernaut doesn't have much going for him beyond being a construct while his minions, unique to his fight, can be spawned via cluster bombs anywhere on the map that isn't past the 3 Imperial Guards at the top, with decent stats going for them. He has one particular key problem: well-upgraded Paladins can put him in a melee lock loop. The Juggernaut does have an area attack and a long-range missile launcher, but they don't do enough damage to wreck fully upgraded Paladins. This isn't too bad, though, because he's the first boss. He is not supposed to be very difficult, but to show the player how important it is to focus on a combination of stalling and sheer dps to take on extremely durable enemies.
Strategy
- The Juggernaut enters the map from the right, so concentrate your towers in this area.
- Make sure that you have towers near the top of the map. The Juggernaut's Golem Heads often spawn very close to the castle. Using Arcane Wizards with teleport is also a good tactic to stall Golem Heads, as they can send all of them back in the path.
- Whenever you get the chance, place reinforcements near the Juggernaut. Even if he destroys them with one strike, they will slow him down.
- If the player is using a durable melee hero like Gerald or Malik, they are almost useless against the Golem Heads and should be used to tank against the boss instead.
- The Juggernaut prioritizes the Imperial Guards with its missile.
Related Achievements
 NUTS AND BOLTS Defeat The Juggernaut.
Trivia
- The 500mm Big Bertha's special abilities Dragonbreath Launcher and Cluster Missile Xtreme operate very similarly to the Juggernaut's weapons, implying that it was the result of reverse engineering the Juggernaut.
- When playing The Citadel on Heroic Challenge or Iron Challenge, the Juggernaut's head/helmet is mounted on a pike outside the castle walls.
- The Dark Knight and Dark Slayer seem to be minions of The Juggernaut as they have similar helmets.
Appearances
")
")
")
| Enemies • Kingdom Rush | |
| Enemies | Goblin • Orc • Shaman • Ogre • Gargoyle • Shadow Archer • Dark Knight • Wulf • Worg • Golem Head • Goblin Zapper • Orc Champion • Worg Rider • Forest Troll • Hobgoblin Chief • Bandit • Brigand • Marauder • Giant Spider • Spider Matriarch • Spider Hatchling • Raider • Pillager • Troll • Troll Champion • Troll Chieftain • Yeti • Rocket Rider • Dark Slayer • Son of Sarelgaz • Troll Pathfinder • Troll Breaker • Demon Spawn • Demon Lord • Demon Hound • Demon Imp • Skeleton • Skeleton Knight • Necromancer • Magma Elemental • Husk • Noxious Creeper • Mutated Hatchling • Tainted Treant • Swamp Thing • Rotshroom • Zombie • Giant Rat • Wererat • Fallen Knight • Spectral Knight • Abomination • Werewolf • Lycan • Black Hag • Sheep • Demon Legion • Flareon • Gulaemon • Cerberus |
| Bosses | The Juggernaut • J.T. • Vez'nan • Sarelgaz • Gul'Thak • Greenmuck • The Kingpin • Ulguk-Hai • Moloch • Myconid • Lord Blackburn |
| Enemies • Kingdom Rush: Frontiers | |
| Enemies | Desert Thug • Dune Raider • Desert Archer • Sand Hound • War Hound • Immortal • Fallen • Executioner • Giant Scorpion • Giant Wasp • Giant Wasp Queen • Dune Terror • Sand Wraith • Lesser Efreeti • Anoobis • Jungle Spider • Jungle Matriarch • Spiderling • Savage Warrior • Savage Hunter • Witch Doctor • Earth Shaman • Spirit Shaman • Blood Trickster • Savage Zombie • Savage Brute • Gorillon • Poukai Rider • Poukai • Parasyte • Reaper • Mandrilos • Reaper Lord • Saurian Razorwing • Saurian Quetzal • Saurian Broodguard • Saurian Myrmidon • Saurian Blazefang • Saurian Nightscale • Saurian Darter • Saurian Brute • Saurian Savant • Shade Elemental • Shred of Darkness • Saurian Deathcoil • Gunboat • Greenfin • Redspine • Blacksurge • Deviltide • Bluegale • Bloodshell • Zombie • Ghoul • Bat • Werewolf • Abomination • Lycan • Ghost • Phantom Warrior • Jack'O Lantern • Vampiresa |
| Bosses | Nazeru • Quincon • Umbra • Leviathan • Vasile • Xyzzy |
| Enemies • Kingdom Rush: Origins | |
| Enemies | Gnoll Reaver • Gnoll Burner • Gnoll Gnawer • Hyena • Perython • Gnoll Blighter • Ettin • Twilight Harasser • Gnoll Catapult • Gnoll Warleader • Twilight Brute • Blood Gnoll • Blood Ogre • Ogre Magi • Sword Spider • Satyr Cutthroat • Satyr Hoplite • Webspitter Spider • Gloomy • Twilight Scourger • Scourger Banshee • Bandersnatch • Redcap • Twilight Avenger • Boomshroom • Munchshroom • Fungus Breeder • Zealot • Bunny • Blood Servant • Screecher Bat • Mounted Avenger • Razorboar • Twilight Evoker • Twilight Golem • Cloud Stalker • Spiderbrood • Twilight Heretic • Son of Mactans • Arachnomancer • Drider • Shadowspawn • Devourer • Dark Spitter • Shadow Champion |
| Bosses | Hi-Hi Enha • Malicia • Spider Goddess • Bram the Beheader • Baj'Nimen the Hateful • Godieth |